You’ve just pulled into your campsite and have a blank canvas in front of you and a vehicle packed with gear. What should you do first? Where should the camp kitchen go? What’s the best place to put your tent?
This guide on setting up your campsite will simplify the process and get you relaxing by the campfire in no time.
Setting up a Frontcountry Campsite: Cheat Sheet
If you’re planning on camping at a frontcountry (or drive-in) campsite, you’ll want to have designated areas for cooking, for sleeping, and for your campfire. Here are the steps to follow in setting up your campsite:
- Survey the site and plan your layout based on what has been provided
- Set up your camp kitchen shelter first so that you have a protected area to unload the rest of your gear
- Pitch your tent, making sure that it is in a flat spot and well away from both your kitchen and the firepit
- Add comfort and convenience items to your site, like a drying line, camp chairs, and a hammock
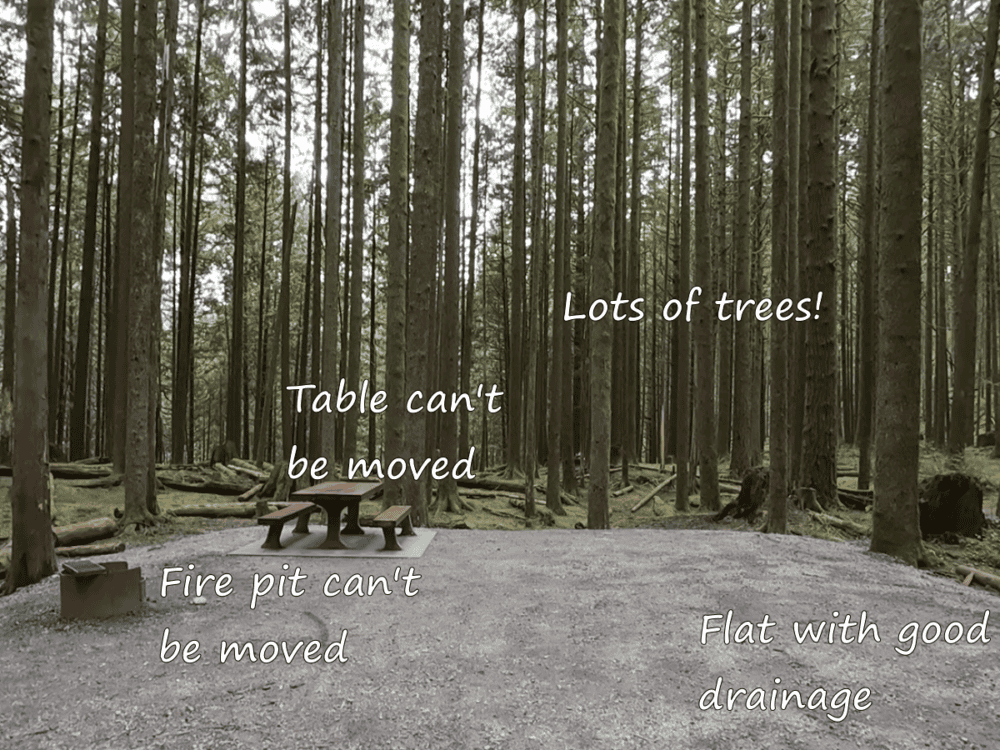
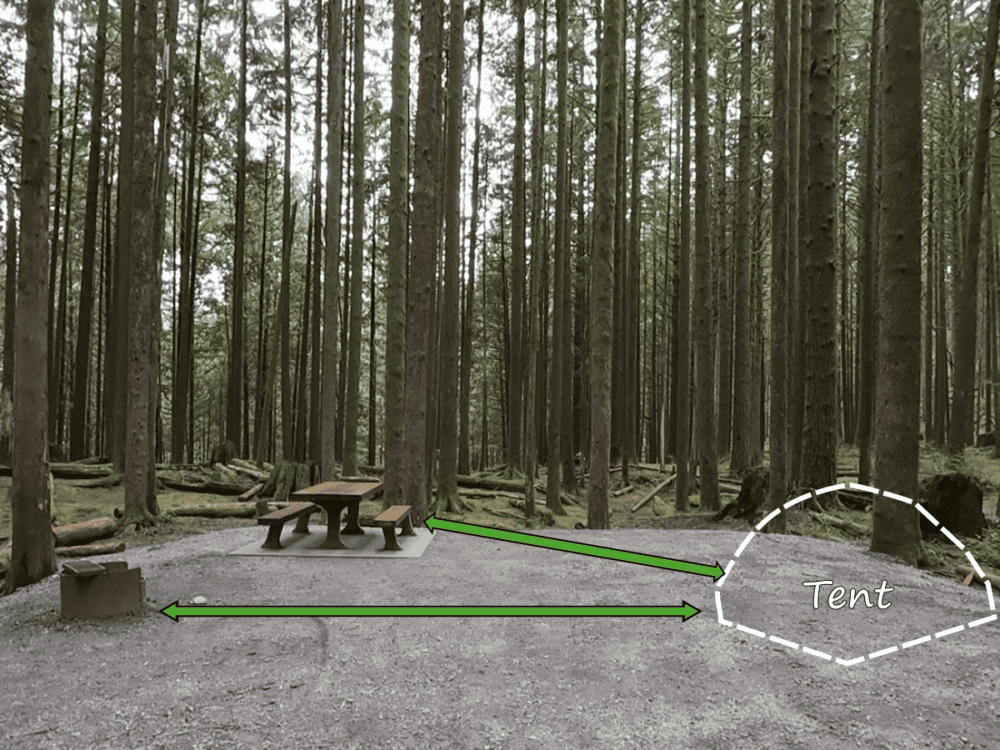
Many frontcountry campsites will have immovable fire pits and tables, so your campsite layout will be defined for you.
Setting up a Frontcountry Campsite: Full Guide
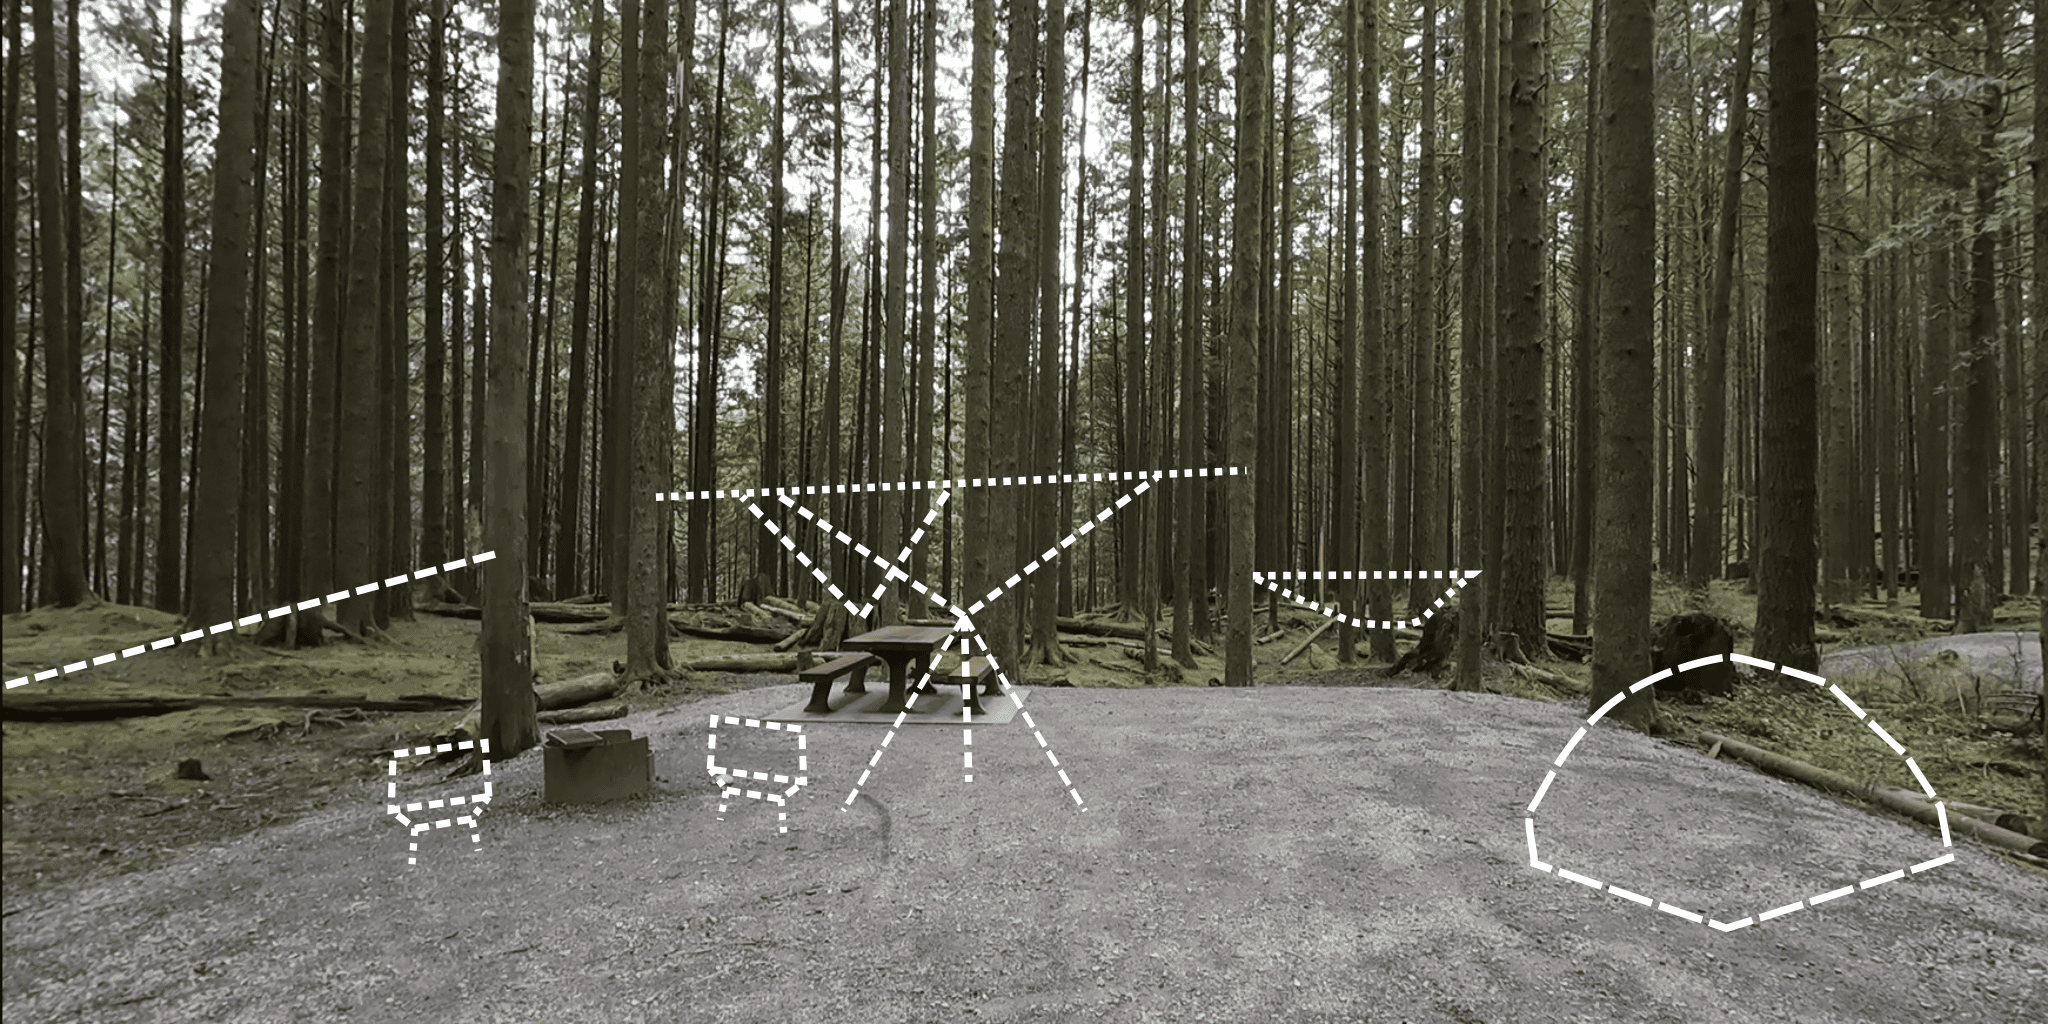
Step 1: Survey the Campsite and Plan Your Layout
When camping in a campground, you will either select a campsite or have one assigned to you. Every campsite is different, so the first thing I do on arrival is survey the scene with these questions in mind:
- What can be moved and what’s fixed in place?
- Is there a spot where the ground is level and does it drain well?
- Are there trees that can be used to help with shelter and camp convenience items?
An optimal campsite layout is one where:
- Your tent is as far away from the kitchen as possible to keep food smells away
- You are able to have a sheltered kitchen area
- Both your kitchen shelter and tent are far enough away from the fire pit so that stray sparks don’t melt holes in your tent/shelter fabric
- There is ample space to walk around without tripping on guy lines
It is quite common for the fire pit to be immovable. Most campsites will have a picnic table that may also be immovable. Your layout will then be a bit of a compromise.
Step 2: Set-up Your Camp Kitchen Shelter
Having a shelter for cooking, eating, relaxing, and playing games is always a good idea. I set my kitchen shelter up first when car camping as it gives me a place that is protected from the elements to unload my vehicle.
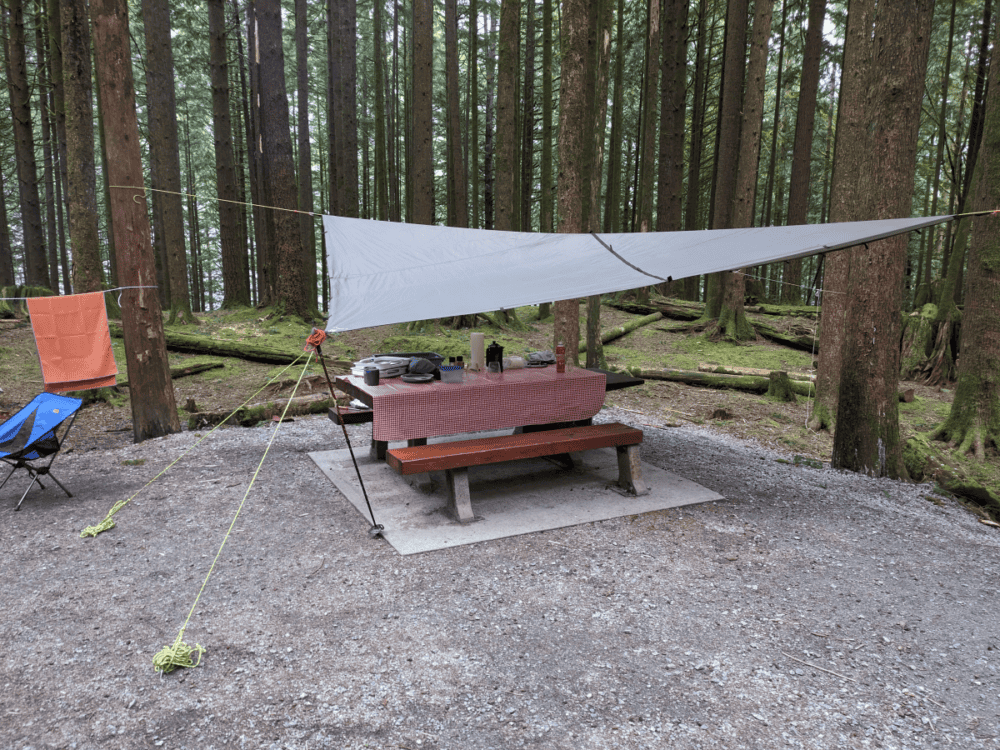
The ideal shelter will keep you protected from sun and rain. Your kitchen shelter can be a tarp, a pop-up shelter, or a dining tent. I personally prefer using a tarp as it offers the most flexibility and is lightweight. Purpose-built dining shelters are also popular for frontcountry camping, particularly if you expect lots of biting insects. These shelters will often have noseeum mesh to keep the bugs at bay, but they tend to be bulky to pack and aren’t as good at shedding rain. I’ve also seen lots of 10’x10′ pop-up shelters around campsites I frequent. While bulky, they are easy to pitch and offer good rain protection. They do tend to be fragile and can get destroyed in moderate winds if not weighted down.
Step 3: Pitch Your Tent
Your tent should be pitched as far away as possible from your camp kitchen. I live and camp in bear country, and the last thing I want is a visit from a bear because my tent has picked up scents from cooking dinner. Other critters (like mice and racoons) are also attracted to food and food smells, so keeping your tent away from your kitchen reduces the chances of having unwanted furry tent mates.
It’s also important to ensure that your tent is well away from the fire pit so that stray sparks don’t land on your tent and melt the fabric. This is less of an issue for tents made of canvas.
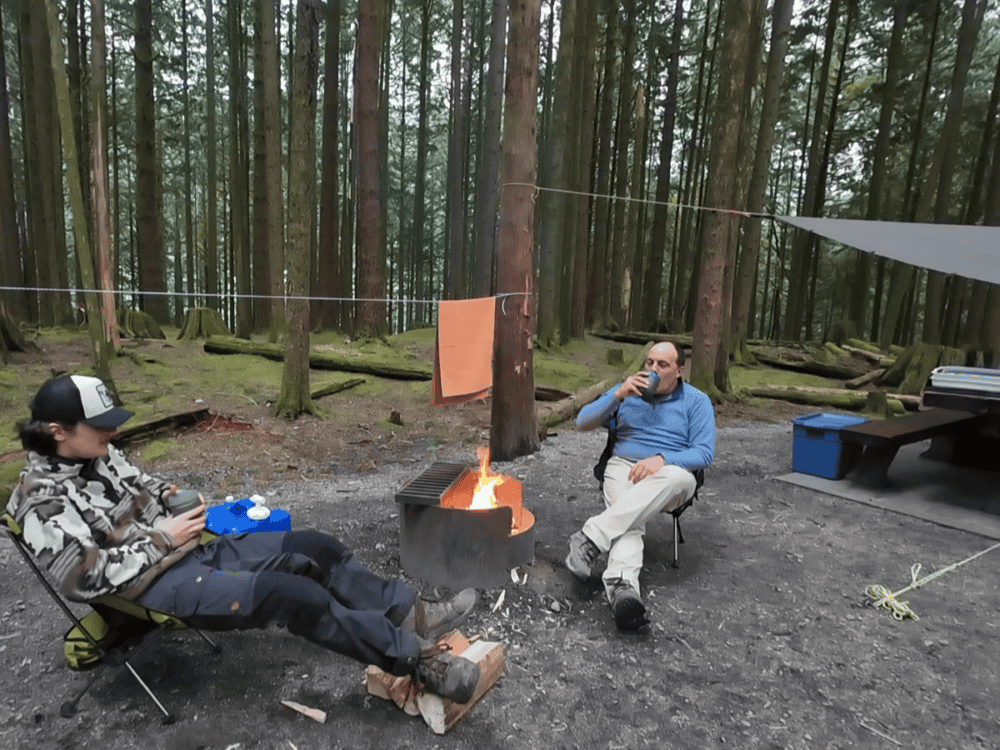
Step 4: Add Comfort and Convenience Items
With your camp kitchen shelter and tent all set-up, it’s time to focus on making your campsite your true home away from home. Assemble your camp chairs, hang a drying line, set-up some games, and possibly even hang a hammock. Unpack your personal gear into your tent, get your kitchen ready, light a fire, and relax!