Not properly staking a tent is one of the most common mistakes that rookie campers make. It’s important to do it correctly to maximize the tent’s wind and water resistance and to ensure that you enjoy your camping trip to the fullest.
Wondering how to stake a tent? Follow these steps to stake a tent the right way:
- Choose a good site and clear it
- Use stakes that are appropriate for the site
- Set up the tent on a ground sheet
- Stake down the base of the tent
- Stake the corner guy lines at a 45-degree angle
- Attach the guy lines to the hooks on the stakes to tension them
- Add more stakes and guy lines where necessary
- Reinforce The Stakes when needed
Properly staking a tent prevents it from getting blown about in windy conditions, and staking the rain fly out away from the tent’s body helps to keep water out. Learning to stake a tent correctly is an essential skill to have if you plan on going camping a lot.
1. Choose A Good Site
To stake a tent properly, you must first make sure that you set the tent up in a suitable location. Choosing a good campsite is not as simple as it sounds!
Find a spot with firm soil so that the tent pegs will stay secure once you’ve knocked them onto the ground. It should be level without any bumps or large tree roots. Avoid rocky sites or sites with extremely hard soil.
One can pitch a tent on loose sand or on frozen or snow-covered ground, but it makes things a little more complicated. If possible, avoid sites like this.
Avoid setting up camp on green grass, in a depression in the ground, or near a body of water. You may have issues with condensation inside your tent.
2. Use The Right Type Of Stakes
There are different types of tent stakes, and it is important to use the correct ones based on the surface you are camping on. It’s handy to keep a few different types of stakes in your tent bag, so that you are prepared for camping on any soil type!
If your camping site has firm soil, you can use 7-inch to 11-inch galvanized steel stakes (the kind that most traditional tents come with).
Lightweight 7-inch aluminum stakes (the kind that comes with lightweight backpacking tents) also work well in firm soil. They have a 3-sided design that maximizes their surface area and grip.
If you are camping on sandy soil or on snow, you need longer tent stakes. The extra length provides more surface area, so they grip the soil more effectively.
You can buy tent pegs that are specifically designed for use in sand or snow. These are usually around 12 inches long and are made from aluminum. These stakes have a slight curve to them and have several small holes. These design features are for increasing their holding power.
3. Set The Tent Up
Lay down a waterproof groundsheet and lay the base of your tent out on top of that. Insert the tent poles and set the tent inner up fully before you begin staking it down. Staking the base down before you set the tent up makes inserting the tent poles very difficult.
How you position your tent is important for wind resistance and ventilation. If the conditions are calm and no rain or strong wind is forecast, orient the tent so that the prevailing breeze blows through the tent door and out the window. This will help to prevent condensation inside.
In strong winds, it is best to position your tent with the narrowest side facing into the wind. If the broadest side of the tent faces into the wind, your tent will act like a sail and rip the stakes out of the ground.
4. Stake Down The Base Of The Tent
With the tent set up, it’s time to start staking it down! Grab your rubber mallet, a hatchet, axe, tire iron, or a big, heavy rock.
A rubber mallet (like this one) is best because it does not damage the stakes, but it is only practical to carry if you are camping near a vehicle. If you are backpacking, the back of an axe head or hatchet will work fine.
Insert stakes into the webbing loops at the base of each corner of the tent. Drive the stakes into the ground all the way.
Make sure that the stakes are fully vertical as you drive them in. This will maximize their holding power.
Do not use your foot to just push the stakes into the soil. If the stake can go in that easily, it can just as easily come out.
5. Stake The Corner Guy Lines
The next step is tying the guy lines and staking them down. Using guy lines correctly will ensure that the fly sheet is tensioned properly. This will keep the inside of your tent dry and ensure that the tent holds up against strong winds.
Guy lines also help to optimize the structure of the tent and maximize the amount of space inside.
Start by laying all your guy lines out, making sure they are untangled. You should notice that each one has a looped end and a free end, with a tensioner that can adjust the size of the loop.
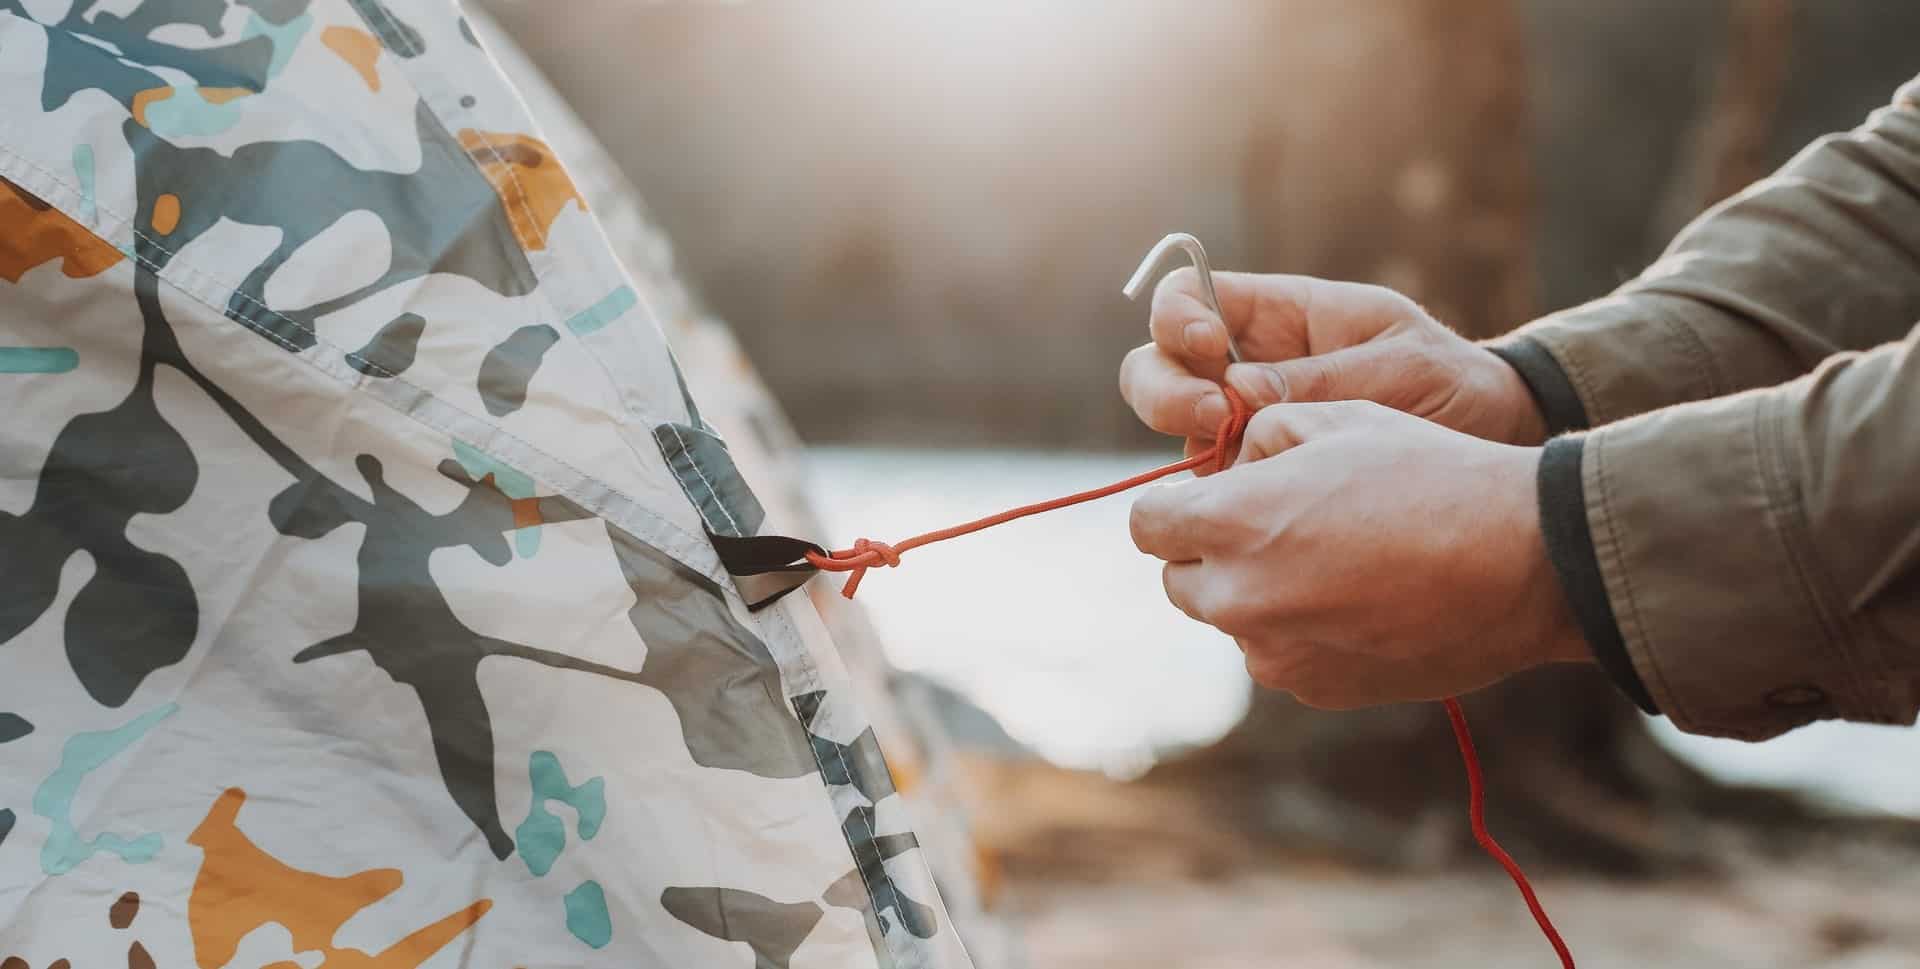
Lay the fly sheet over the tent in the right orientation. Tie the free ends of the guy lines to the tent loops on each corner of the fly sheet using a simple hitch knot.
Place the hook end of the tent stake through the looped end of the guy line, pull the line taught and lightly push the tent stake into the ground at a 45-degree angle away from the corner of the tent.
The hook on the tent stake must face away from the tent! Orienting them correctly will help to prevent the rope from slipping off in windy conditions.
Use a hammer or heavy object to drive the stake all the way into the ground. There should be some slack in the guy line. Do this on all four corners of the tent.
6. Tension The Guy Lines
Next, you need to tension the guy lines. Tensioning them will pull the fabric of the fly sheet nice and taught so that it functions properly in windy or rainy conditions.
Grab the tensioner on the guy line and hold the line above it to slacken it slightly. This makes it easier to push the tensioner up along the guy line. As you slide it upward, the guy line will get more and more taught.
Tension the guy lines on all four corners of the tent. Adjust the tension on each guy line so that the seams of the rain fly align with the poles of the tent body.
If it starts raining, you may need to re-tension the guy lines, as they tend to stretch when they get wet. Make a habit of re-tensioning them before you go to sleep at night.
7. Add More Stakes And Guy Lines Where Necessary
You will notice multiple guy-out points along the outsides of the tent walls and the rain fly. It is unnecessary to use each one, but for maximum stability, water and wind resistance, it’s good to add guy lines to points uniformly around the tent.
The loops on the bottom edge of the rain fly are for staking it away from the tent body to keep water out. It is always recommended to use these loops because even when it is not raining, you do not want the rain fly in contact with the body of the tent.
The loops that are located near the tent’s doors and windows are for adding guy lines that improve the ventilation of the tent. They also help to extend the space inside the tent.
The loops located directly above the tent poles are for stabilizing the tent in strong winds. It is up to you how many of them you use, but it is recommended that you at least add guy lines on the windward side of the tent.
8. Reinforce The Stakes Where Necessary
If you are camping in gale-force winds and you feel there is a possibility of the stakes being pulled out of the ground, you should reinforce the stakes for peace of mind.
Find heavy rocks or logs and place them on top of the stakes once you have driven them into the ground. This will give them a bit of extra staying power.