
Is water coming in through the seams of your tent? Or are those seams just beginning to peel away? If so, you don’t need to shell out your hard-earned cash on a new shelter – you just need to learn how to seam seal a tent!
Seam sealing a tent can help immeasurably with re-waterproofing your tent – and learning how to seam seal a tent is surprisingly easy. Here’s how to do it.
How to seam seal a tent – quick guide
Prep/seam cleaning time: 5 mins (without cleaning the whole tent)
Application time: 5-10 minutes/seam
Drying time: 12 hours
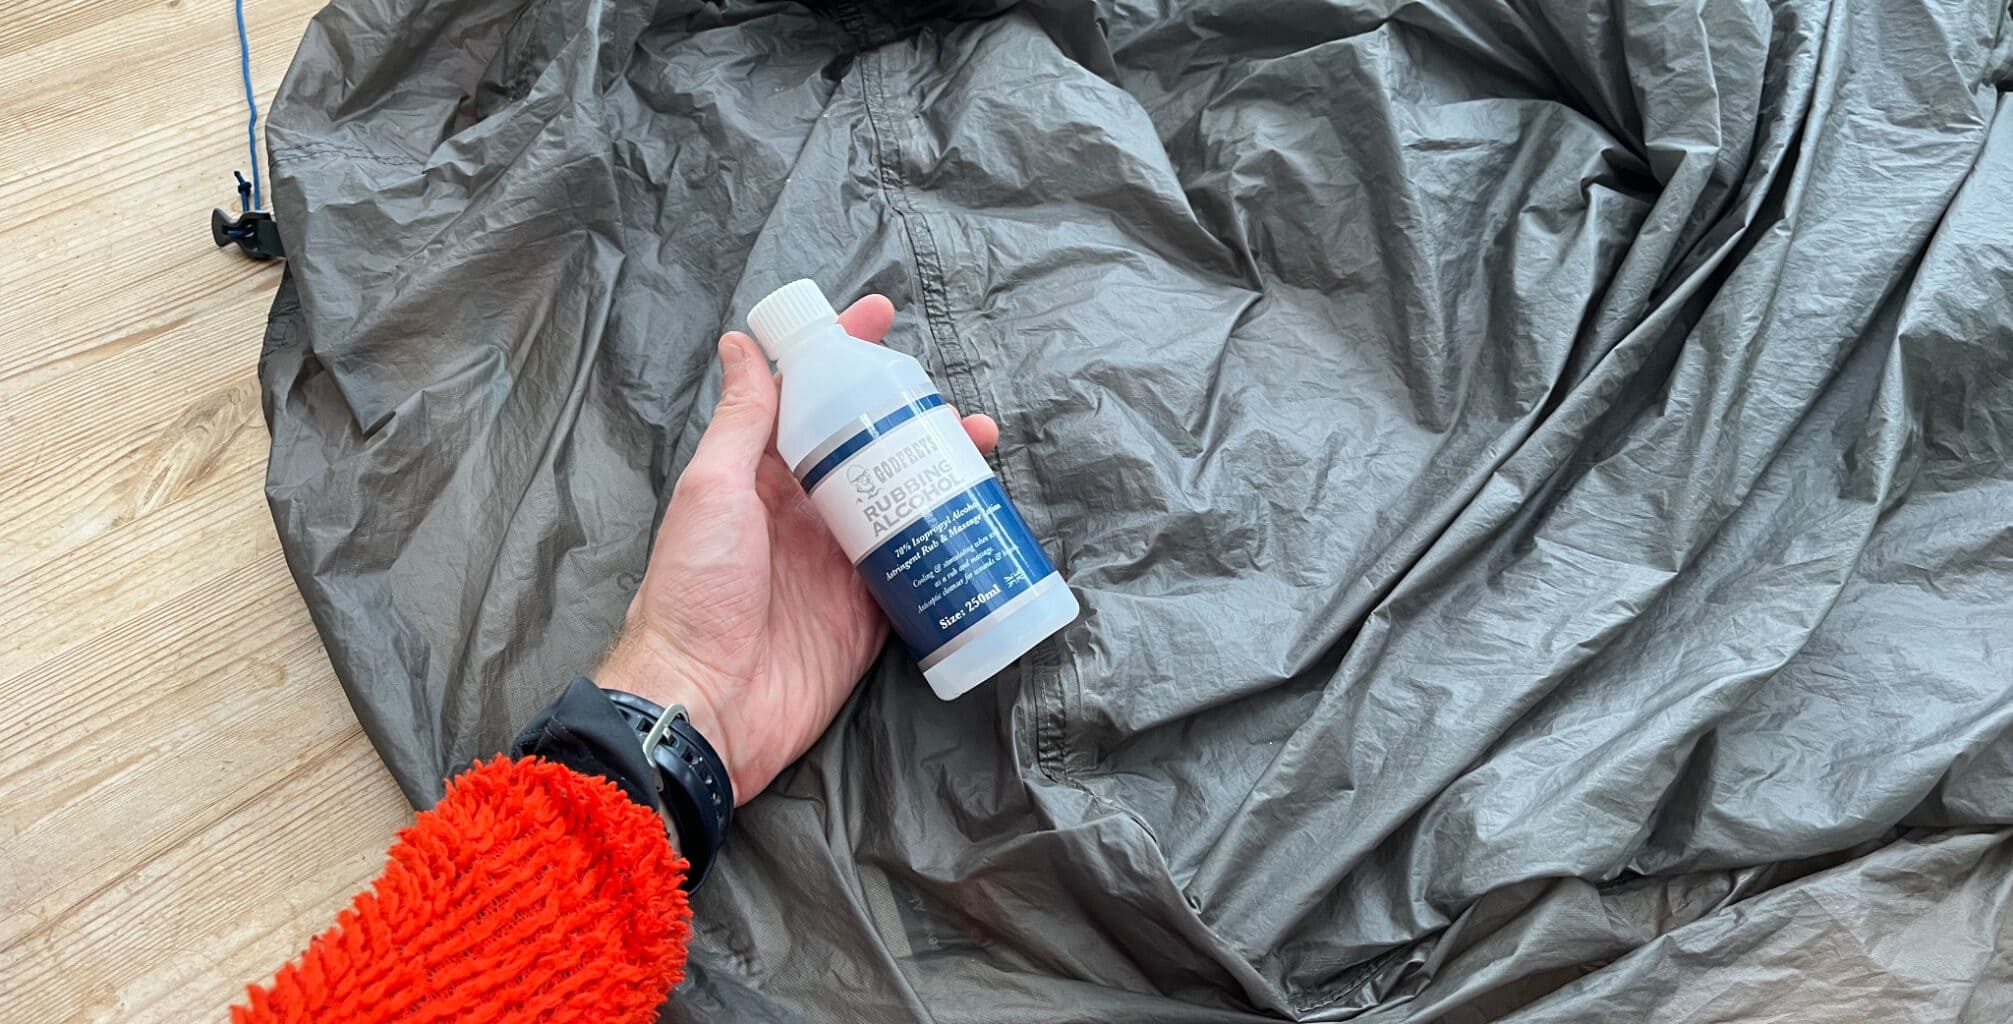
- Before sealing, clean the seam with rubbing alcohol and let dry
- Gently squeeze the sealant along the length of the affected seam
- Leave sealant to dry for at least 12 hours before use
What you’ll need
- Rubbing alcohol for cleaning the seam before sealing
- Seam sealing kit (check your tents waterproofing coating material to see if you need the sealant for sil-nylon and dyneema-based tents or for urethane-based tents)
- Your tent needs to be clean and completely dry
How to seam seal a tent in three easy steps
1. Clean the seam
Before you seam seal your tent, clean the seam in question with rubbing alcohol on a small flannel and let it dry fully.
If the main body of your tent is dirty, we’d recommend cleaning the whole area in a body of lukewarm water with a mild dish soap or Nikwax Tech Wash before seam sealing your tent.
This ensures that no dirt or debris will contaminate the area you’re trying to fix.
2. Apply Sealant
Once you’ve cleaned the seam with rubbing alcohol, gently squeeze the sealant along the length of the affected seam (you can do this with or without the brush attached). Do this on both the inside and outside surfaces of the seam.

The coating of the materials may be different on the inner and outer surfaces of your tent’s seams, so check on the manufacturer’s website (or on online forums) for more detailed information on the specifics of your tent, as this’ll affect what seam sealant you need to use.
Make sure that the seam is completely flat when you’re applying the seam sealant. Accidentally applying sealant over folds in the fabric could damage the material when separating those folds (when the material becomes taut in the tent set-up process, for example).
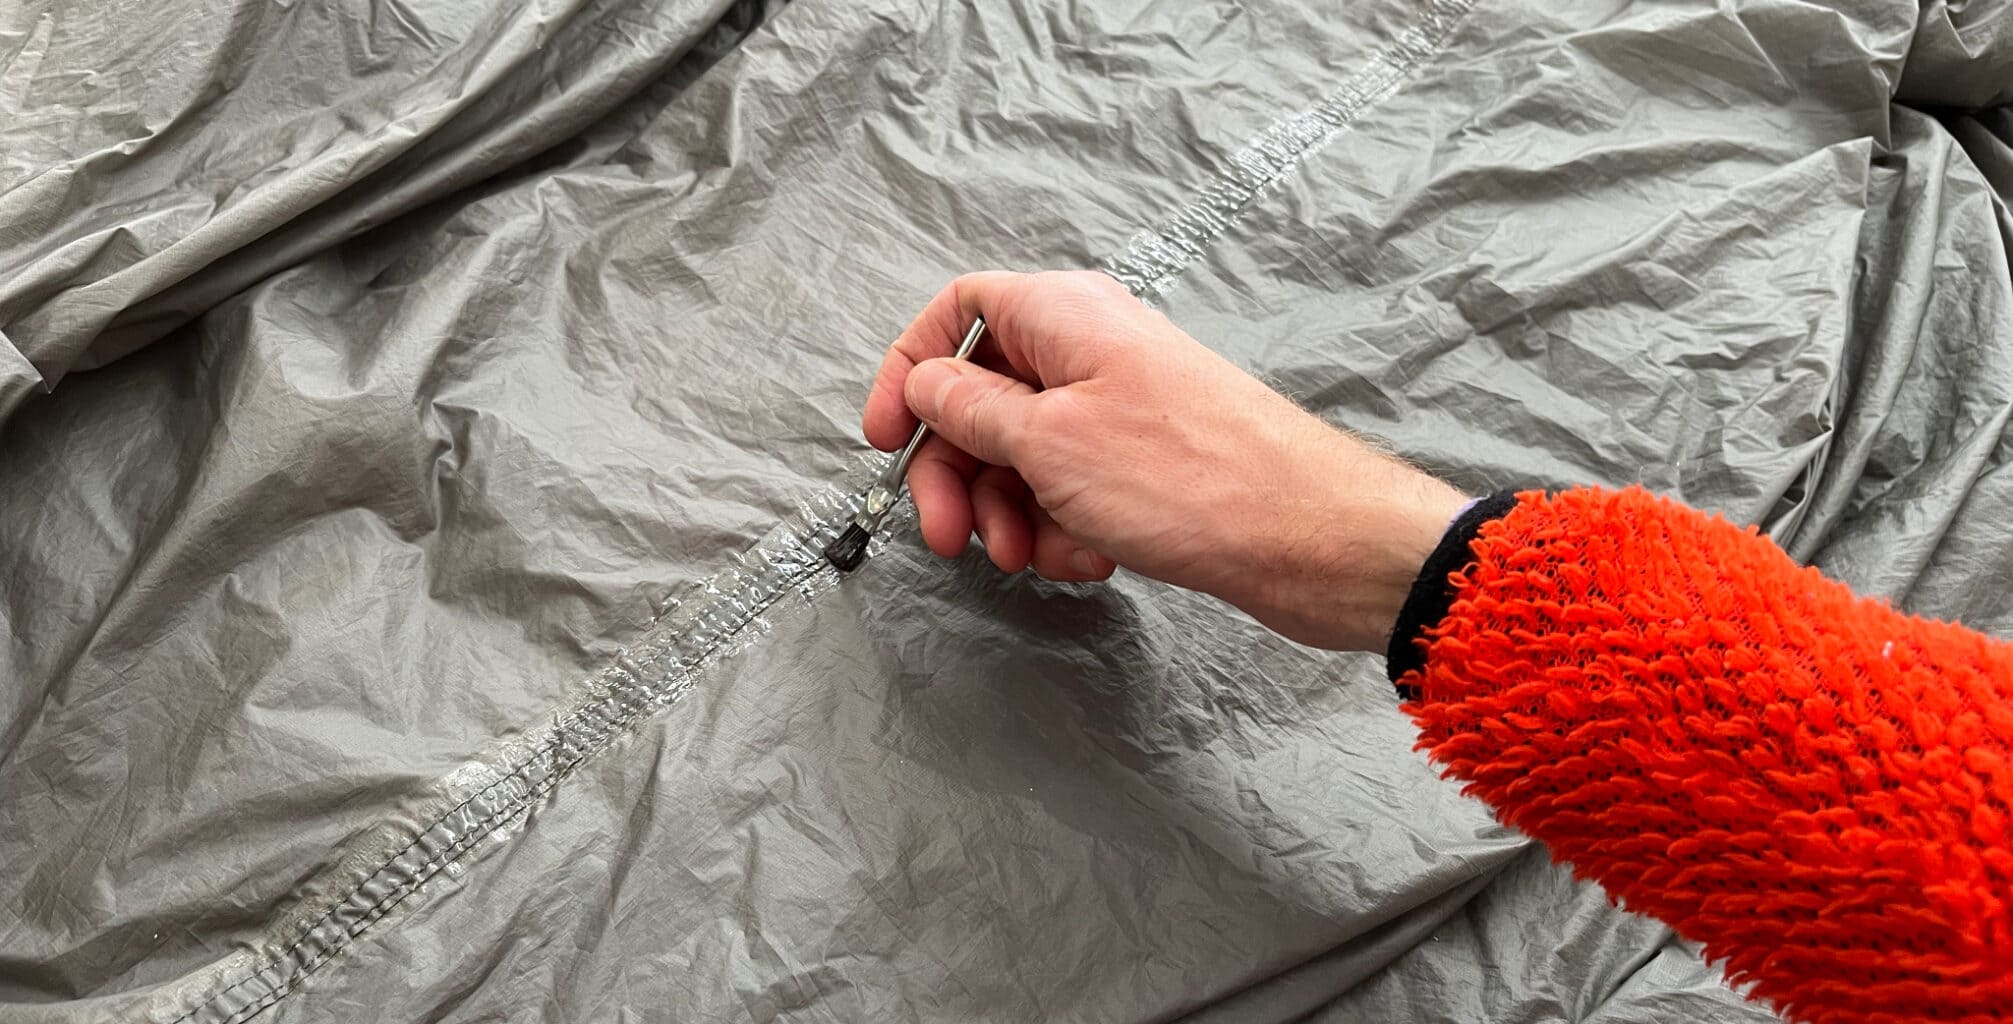
If necessary, use the brush attachment to distribute thickly-coated patches of seam sealant along the seams.
3. Wait before use
Having successfully completed the seam sealing process, leave the seam sealant to dry for at least 12 hours before using your tent.
The makers of the seam sealant I used on my sil/poly tent recommend that you let it set in temperatures of 60F/15C or above. As I’m in Britain (in November), this requires some doing – so I put it in an airing cupboard – making sure that none of the tent folded over onto the seam on which I’d applied the sealant.
Important information on tent materials
Not all tents are made from the same material – so different materials will require different seam sealant to work (i.e. seam sealant designed for silicone-based materials won’t work on polyurethane-based materials).
Some tents (like Gossamer Gear’s The One, for example) are, somewhat confusingly, made with a SIL/PU (or “sil-poly”) fabric – i.e. a combination of both materials. This, naturally, makes seam sealing difficult. Despite my extensive research, I haven’t been able to find out which side of the tent (i.e. the inner or the outer) is coated with silicone, and which side is polyurethane.
If your tent is made from sil-poly and you need to seam seal it, the best course of action is to contact the manufacturer directly and ask them which seam sealant to use for your particular tent.
Finding the material that your tent is made from is relatively simple. If it doesn’t show it on the little warranty tag that’s sewn somewhere inside your tent, you’ll be able to find it out on the manufacturer’s website.